Over my years of shoemaking (about 9 at this point), I’ve picked up a few techniques and tricks through trial and error, and I thought I might share some of them, as people might be interested in more than just pictures of recent work and the occasional lesson or technique. By no means am I an expert – I haven’t been making shoes for decades, and I’ve yet to cross even the basic threshold of making 100 pairs of shoes. Additionally, I’ve only taken one informal class on shoemaking, so the majority of my knowledge comes from trying things out based on written descriptions and illustrations, but primarily from trial and error. As a result, if you have some potential insight to offer, I welcome it heartily! Hopefully, this series of posts might entertaining, insightful, and potentially even amusing.
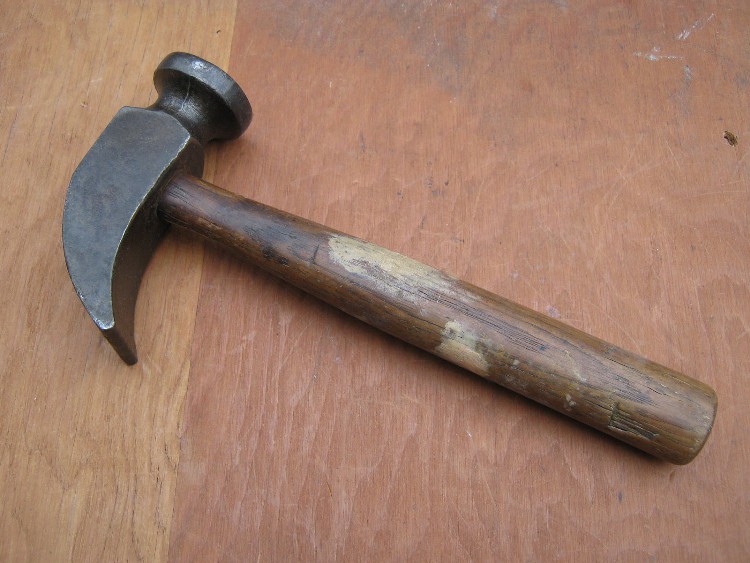
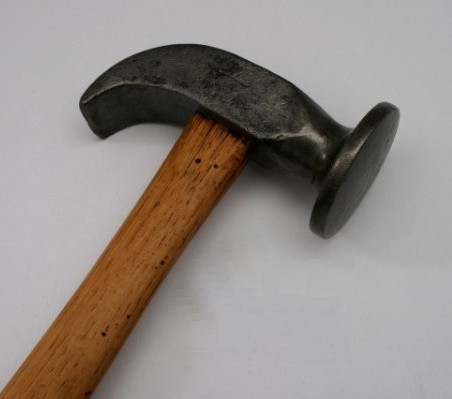
This particular post focuses on an important tool of the trade – the hammer. In your visits to antique stores or looking through various Ebay or Etsy shops, you might have seen hammers looking very similar to the two below (if not, just type in “cobbler hammer”).

|
|
|
Interestingly enough, there do not seem to be many medieval descriptions or depictions of hammers used in medieval or Renaissance shoemaking.
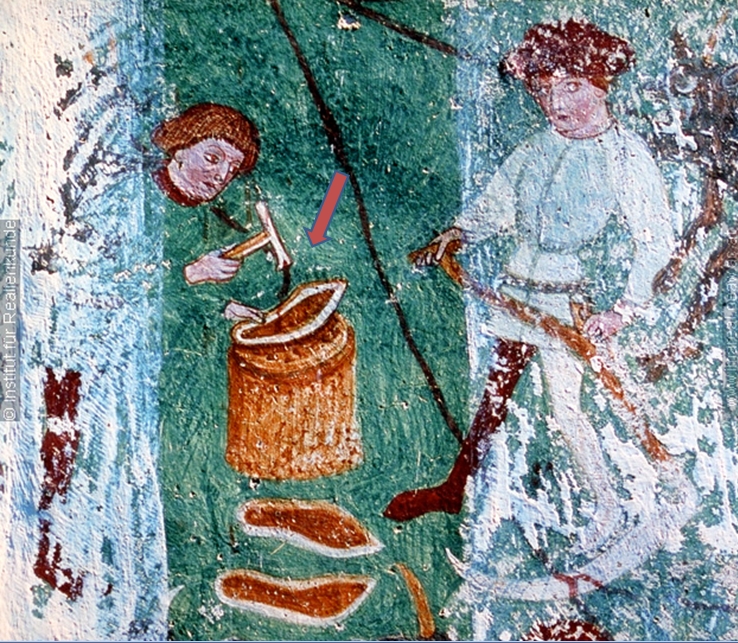
There are plenty of images of blacksmiths using hammers, but not very many for shoemakers. Marc Carlson’s appendix of shoemaking tools does list a mallet for turning a turn shoe right side out and to flatten the sole/lasting margin (that is, the little bit of excess leather of the upper in a turn shoe), and although I use my hammer for that purpose, that is not quite what I have in mind here. Additionally, it seems curious that a hammer is not mentioned even for such a critical operation such as lasting, where one stretches leather around a wooden last to keep it in place, since one must necessarily use something to tacks the upper leather around and to the bottom of the last. The closest thing we have to a hammer used in shoemaking comes from a fresco from the Church of St. Jacob at St. Ulrich in Grooden, South Tyrol, dated to sometime between 1400 and 1475. This fresco, showing craftsmen working on the Sabbath, is difficult to read, but it does appear that the worker on the left (the shoemaker), is pulling nails out of what appears to be a lasted shoe. It also appears that those darker strokes could represent lasting tacks. My thanks to Larsdatter for the fantastic evidence.
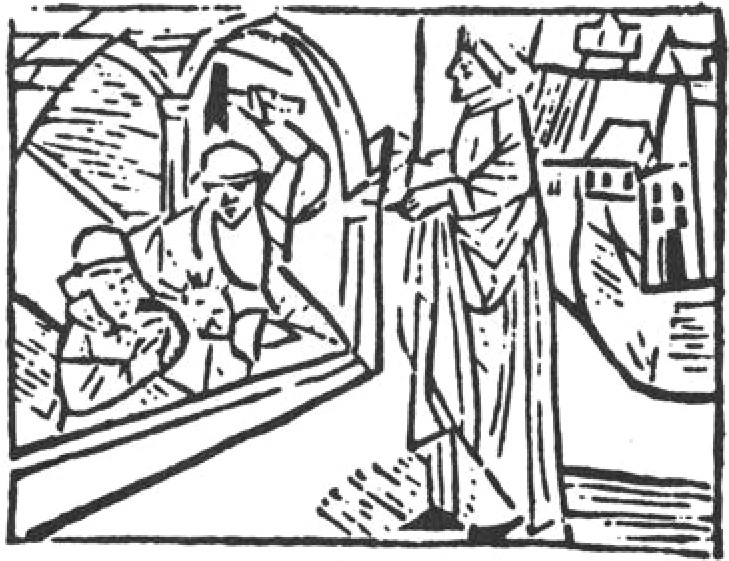
We also have an anonymous woodcut from the 1490 text “De Geschnicht de Pfarrers vom Kalenbergcomes,” entitled “The Parson asks the Cobbler to Fix his shoes.” Although not technically a shoemaker (a cobbler was a worked of old leather and repairer of shoes), it shows a similar type of hammer as to that above, and clearly being used to beat on something (though the woodcut is rather difficult to read).
Marc Carlson was good enough to provide this image on his site.
In Queen Elizabeth’s Wardrobe Unlocked (p211), June Swann makes a point that there are many tools whose use is uncertain, such as the “dresser,” which may be some knife or hammer for preparing leather. In any event, I’m interested in hammers of two types – the first is what I will call a shoemaker’s hammer, and the other is a lasting hammer, or a lasting pliers. We will focus on the first – the second is a topic for another time, since for lasting, shoemakers seemed to have used a particular type of pliers which had a hard point built-in for hammering and tacking the upper to the last.
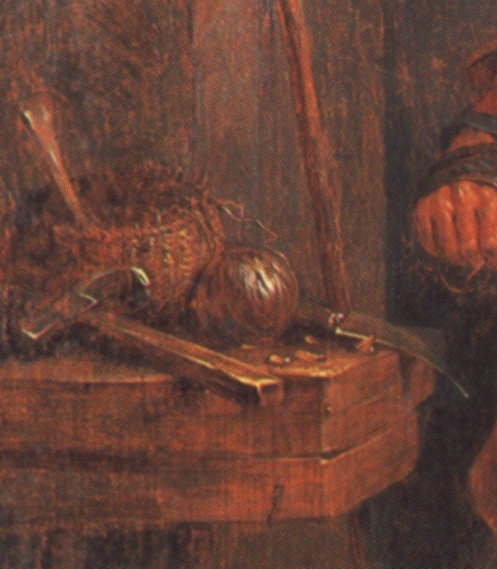
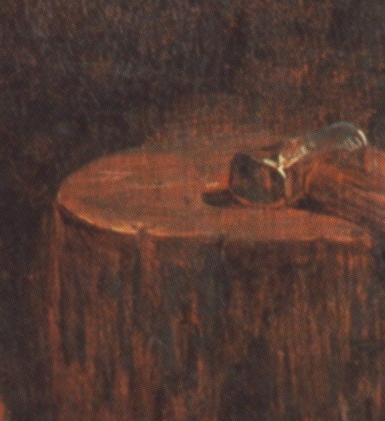
Since we don’t seem to have much evidence for medieval or renaissance shoemaking hammers (aside from the one image posted above), let’s look at what else we have – there are several images of shoemakers with hammers from the early-mid 17th century, such as those seen in The Shoemaker Teaching the Linnet to Sing, possibly by David Teniers the Younger, 1640s, at the Northampton Museum Collection. My thanks to Marc Carlson’s site on shoes for this reference. Note the hammer on the right is on a wooden stump, likely for beating out the leather (discussed below). The one on the left appears to have a claw-type end, and could be used for pulling out lasting tacks. It looks strikingly similar to the hammer depicted in the 15th century fresco above, doesn’t it?
|
|
|
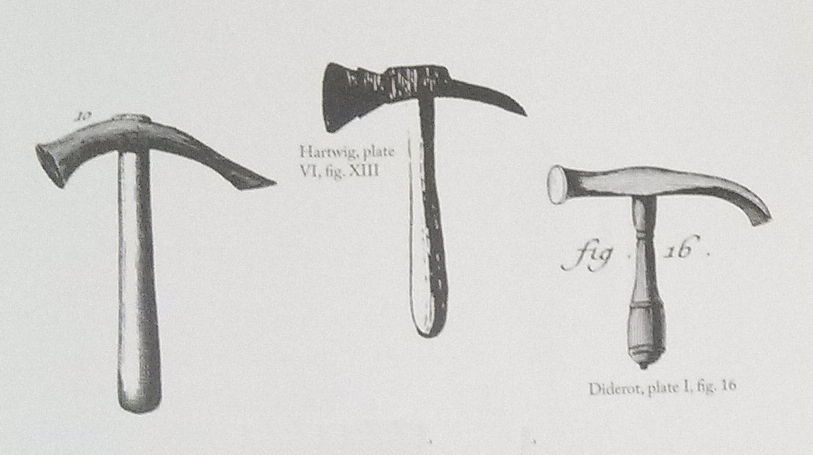
Additionally, we have references from the 18th century, most notably from the works of Garsault (10 in the picture), Diderot, and Hartwig (A German translation of Garsault’s work). Note that this illustration comes from the relatively new translation by D.A. Saguto of Garsault’s text on shoemaking, which I highly recommend and have linked above.
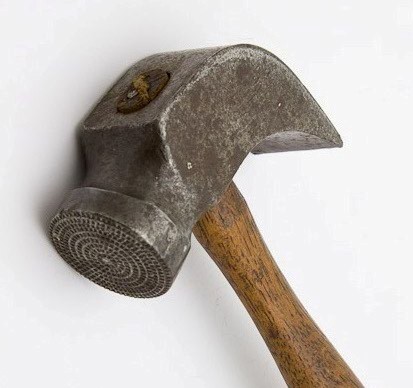
These are the most obvious hammers in the text, and they match the hammer on the left at the very top of the page pretty closely. This hammer, which I’m simply going to call a shoemaker’s hammer, is a multi-purpose tool. The face is flat or nearly flat and smooth. There is a pane at the end of the hammer, but this pane is not used for pulling nails (that is the job of the lasting pliers or a separate nail puller). These hammers are different from what is commonly called a “cobbler’s hammer,” shown above in the picture on the right as well as the two below, but I can’t comment too much on the use of a cobbler’s hammer, as I neither have one nor use one. I suspect some may be used for driving in hobnails or tacks, as their face is not a polished one (image on the left), but there are also plenty of cobbler’s hammers with a polished face (on the right).
|
|
|
With regards to the historical use of the shoemaker’s hammer, from discussion on the Crispin Colloquy, it seems that the pane was used for pounding the sole flat around the edge, although I admit that I seldom use it at all. Garsault, with respect to the pane, often employs it to press the outsole to better fit into the insole and last (p68 of Saguto’s translation), or to bed several layers of leather into each other (p73). With respect to the polished face, that is primarily used for beating the insoles (p66) and outsoles (p68) to make them denser and firmer. Most of the leathers I purchase are already rather dense and compressed, but I admit to not having tried to beat them out as described.
There are a number of things that I find the polished face of the shoemaker’s hammer useful for.
– Flattening the round seam in the joins of an upper. Gentle tapping on the wet seam will flatten it and reduce any possibility of rubbing against the foot, as well as make it flatter on the outside of the shoe. At the upper left of this photo, you will see a round seam which was not tapped, resulting in something of a “wrinkly” effect. I often gentle tap the inside of the seam before I last, and once the shoe is lasted, I will tap the outside to flatten it further against the last.
– Flattening the holdfast. When you inseam the upper to the insole, there is a bit of a bulge that occurs when the seam is pulled tight (typically called the holdfast). After wetting this bulge, the hammer is used to flatten it down. If you were to trim off the lasting margin (the excess upper leather) on this picture, you would then wet the holdfast and tap it flat.
– Tapping wrinkles out in an upper or smoothing out the upper during lasting. Sometimes when lasting, there will be a bit of a bulge, especially around the toe (like here). Tapping these bulges can smooth the upper to the last.
– Flattening the stitching groove on the outsole. When you sew an outsole, you cut a stitching groove first (see this detail on the stitching groove). Once the outsole is stitched on, hammering all around the groove will close this seam and encase the thread in the outsole.
– Flattening the heel stiffener (see here for more details). Gentle tapping of a wet stiffener will make it lay flat.
– Tapping in pegs on a pegged sole. In the pegging lesson, we create a hole for a peg, and these pegs are gently tapped in.
For some of these, one could use rubbing sticks or bones (the topic of a future post), especially when smoothing out wrinkles and such. But, for many of these, I find that the shoemaker’s hammer works quite well. One note of caution – never use your polished shoemaker’s hammer for nailing anything that is metal! You will mar the surface of the hammer, and this is something you ought to avoid at all costs. This seems like common sense, but experience speaks; instead of grabbing the closest thing like a hammer to beat on whatever it is you need beaten, take a moment and get a claw hammer out instead of using your good shoemaking hammer.
It’s great to see you blogging, Francis! I’ve found a couple of so-called cobbler’s hammers in local antique stores with polished faces on both. I’ll let you know how they do since I haven’t yet found a “French” style like you have there.
It’s interesting that the historical hammers actually look a lot like my cooper’s adze, which were more often used as a hammer than a cutting tool.
Looking forward to more posts!
“I’ve been told that sewing isn’t very manly, to which I respond a sewing machine is just another power tool.”
Thanks! And please do let us know how the cobbler’s hammer works out. If it doesn’t quite, Etsy and Ebay always have a decent selection for a good deal. Just get one with a face in good shape!